
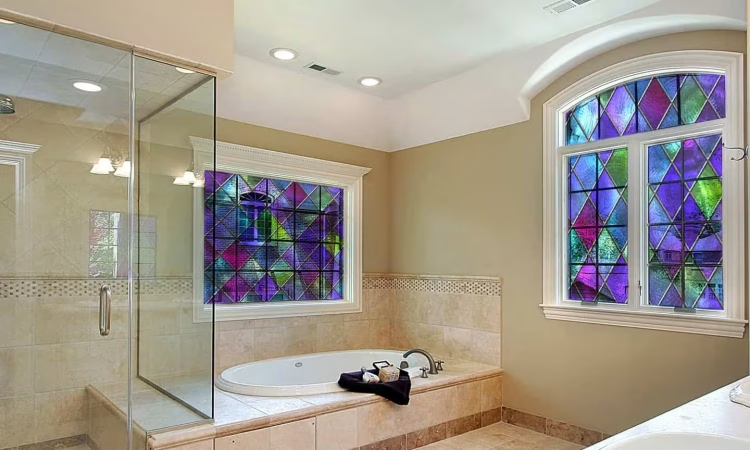
Stained glass window film is a self-adhesive or static-cling vinyl film that mimics the look of real stained glass—without the cost, fragility, or professional installation. It lets light through while adding color and pattern to any glass surface. In 2026, these films have improved significantly in UV protection, helping to cool rooms while providing privacy. And yes, it genuinely looks great when done right, especially in bathrooms or entryways.
It is one of the most beginner-friendly home upgrades you can do. No tools required beyond a squeegee, warm water, and a bit of patience. Whether you want privacy in a bathroom window or a decorative focal point in your living room, there is a film style for it.
Types of Stained Glass Window Film
| Type | How It Sticks | Best For |
| Static Cling | No adhesive – clings with static | Renters; easy removal & repositioning |
| Self-Adhesive | Peel-and-stick backing | Permanent installs; doors and sidelights |
| Gel Film | Gel-based cling | Kids’ rooms; reusable seasonal decor |
| Heat Control Film | Adhesive with tinting layer | Sun-facing windows; UV protection |
What to Look for When Buying
The design range is enormous – from simple frosted geometric patterns to detailed Victorian rose windows. Before buying, consider these three things:
- Light transmission: Some films are very opaque for full privacy; others are light and translucent. Check product photos taken with a light source behind the film.
- Film thickness: Thicker films (around 4-6 mil) hold up longer, resist peeling at edges, and look more premium.
- Window type: Film works best on smooth, flat glass. Textured, double-pane, or frosted glass can reduce adhesion.
How to Apply Stained Glass Window Film (Step by Step)
The process is straightforward – take your time and the result will look professional.
1. Clean the glass thoroughly with glass cleaner and a lint-free cloth. Any dust or residue will show through the film.
2. Measure the window and cut the film slightly larger than needed (about half an inch on each side).
3. Mix a small spray bottle with water and two drops of dish soap – this is your application solution.
4. Spray the window lightly with the solution. This gives you a few seconds to reposition the film if needed.
5. Peel the backing from the film and apply it to the wet glass, starting from the top.
6. Use a squeegee or credit card to smooth out bubbles, working from the centre outward.
7. Trim any excess film with a sharp craft knife along the edges.
8. Leave it to dry for 24-48 hours. Small bubbles that remain usually disappear as the film settles.
Pros and Cons of Window Film vs Real Stained Glass
| Window Film | Real Stained Glass |
| Cost: $10-$40 per window | Cost: $200-$1,500+ per panel |
| DIY installation in under an hour | Professional installation required |
| Removable and renter-friendly | Permanent |
| Less authentic appearance up close | |
| Huge range of designs available online | Custom designs take weeks to make |
Final Thoughts
Stained glass window film is one of those home upgrades that punches well above its price tag. For under $30 and an hour of your time, you can completely change the feel of a bathroom, hallway, or living room window. The static cling versions are especially great for renters – they go on easy and come off without a trace.
If you are after authenticity and permanence, real stained glass is still the gold standard. But for most people doing a home refresh on a budget, the film is a smart, reversible, and genuinely beautiful option.